| This guide will help you to open your connectix
quickcam without destroying it. If you want to do some
small repairs on your camera, if you want to remove the
infrared filter (night vision) or if you only want to
know what's inside, these pages should be helpful. They
are also made for people who don't have the guts to open
their own camera. Please note: The
connectix quickcam was designed to be opened by the
connectix technical service, only. If you open your
camera, you'll do this at your own risk. The instructions
on this page worked for me, but I do not feel responsible
if you follow these instructions and you break your
camera. In other words - don't sue me. Thank you.
This page has been online for quite some time now and
I was very surprised by the big attention it has
received. So far, I have received a lot of messages by
people who were equally successful disassembling their
camera, and only one message by someone who broke the
camera's ir filter. As mentioned before: It's easy, but
you have to do it at your own risk. Jan/97
Update: A reader wrote me that the technical
support team at Connectix told him to look at this page
to find out about how to safely disassemble the camera.
Whoa, am I proud. 20/Feb/97
This is just quick & dirty html code. I did not
think that these pages needed some great web design.
Maybe I will change that some day, but right now, I will
keep things simple.
Comments welcome. Send eMail to
kontakt@hanno.de
This page was inspired by the Brian J. Swetlands's Quickcam
Guts page. He's got colour images!
More information can be found at my Quickcam
developer resources page.
|
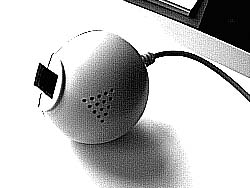 I had to open my qc because the
infrared filter inside the camera ball got loose. This
will probably be the main reason for you to open your
camera, as well.
I had to open my qc because the
infrared filter inside the camera ball got loose. This
will probably be the main reason for you to open your
camera, as well.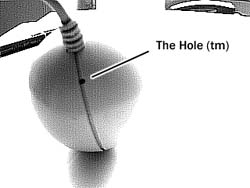 Actually, the secret of how to
open the camera ball without breaking the plastic cover
is just one simple thing: The hole that you see on the
right image.
Actually, the secret of how to
open the camera ball without breaking the plastic cover
is just one simple thing: The hole that you see on the
right image.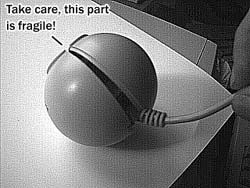 Now you can open the camera
ball. The little black pastic part on the front that
covers the lens is quite fragile, so make sure you do not
bend it too far.
Now you can open the camera
ball. The little black pastic part on the front that
covers the lens is quite fragile, so make sure you do not
bend it too far.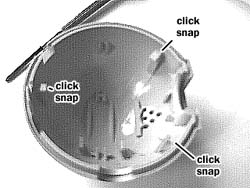 These three plastic clips are
keeping the ball in a whole.
These three plastic clips are
keeping the ball in a whole.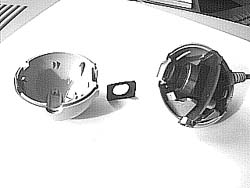 So there you are. This is what
the opened camera ball looks like.
So there you are. This is what
the opened camera ball looks like.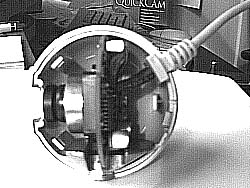 Finally you can get a hold of
the camera interiour.
Finally you can get a hold of
the camera interiour.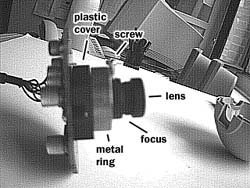 This is the main circuit board.
 Here
you can see the quickcam with different focus settings.
That guy is my colleague Michael who helped me with this
repair. The left image is unsharp, in case you did not
notice.
Here
you can see the quickcam with different focus settings.
That guy is my colleague Michael who helped me with this
repair. The left image is unsharp, in case you did not
notice.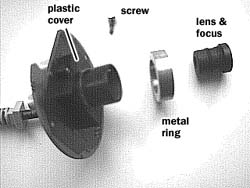 If you want to remove the
infrared filter, you will have to disassemble the plastic
cover that is connected to the circuit board.
If you want to remove the
infrared filter, you will have to disassemble the plastic
cover that is connected to the circuit board. I have to admit, I'm
unstoppable if I have a screwdriver and something to
disassemble.
I have to admit, I'm
unstoppable if I have a screwdriver and something to
disassemble.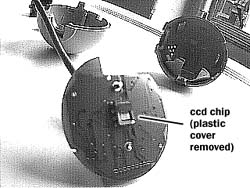 After removing the pastic
cover, you will get a view of the ccd chip.
After removing the pastic
cover, you will get a view of the ccd chip. One last view of the all the
parts before starting to reassemble the camera.
One last view of the all the
parts before starting to reassemble the camera. 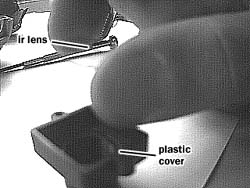 Here you can see us refitting
the ir filter.
Here you can see us refitting
the ir filter.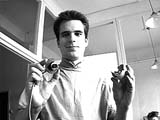 Since this is my webpage, so
why not do something to satisfy my own ego: This is me,
assembling the camera.
Since this is my webpage, so
why not do something to satisfy my own ego: This is me,
assembling the camera.